There are few steps on how to install this application. I will guide you from scratch.
1. Download the HamachiSetup-1.0.3.0-en.zip from my blog (or you can also download the installer (.exe) from its official site.
2. Unzip the file (if you downloaded the zip file !). Extract it to the desktop.
3. Double click on the HamachiSetup-1.0.3.0-en.
4. The rest of the steps will be guided with pics :). The red square requires you to click the spot on the original installation's interface.
Click Next
5.

Yup click on the box and then Next
6.

Ok no red square means do not do anything. Take a look at this pic.
7.
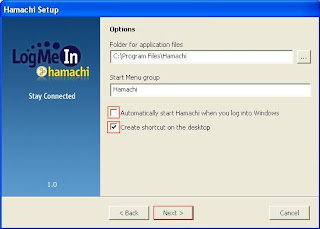
Aha got several red squares means several clicks. Create the shortcut on the desktop will do. You dont have to start hamachi automatically. Then click Next.
8.
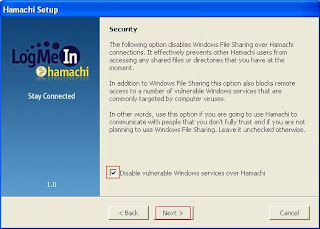
Yup check the disable vulnerable Win services over Hamachi and then Next.
The default setting is the 2nd option. Change it to the 1st option and then Next.
10.
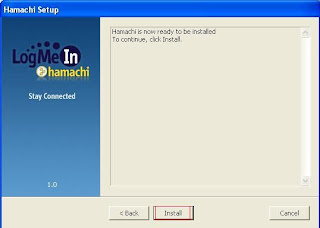
Click Install.
11.

Click Next
12.

Click Finish

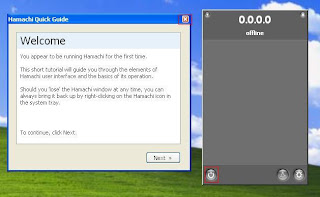
You gonna see this kind of interfaces after finish installing.
13.
Close the guide and switch on Hamachi by clicking the On button.
14.
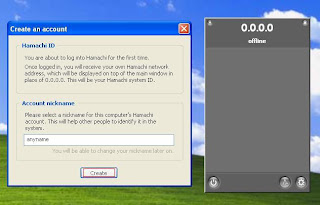
After you already switched it On, it will ask you to create and account. To proceed please create and account. Just put in any account name then click Create.
After you clicked the Create button, your Hamachi will look like this. Your hamachi will probe and sync itself.
Yeah now got yellow squares. You need to do nothing. If the 0.0.0.0 change to any other figure it means that your hamachi account is successfully created. You can also see your account name below the figure.
Now click on the networking button. A menu will pop up. Then click on join an existing network if you want to join a network.
In order to join a network, you need to know what is the network name and its password, the other network must also use Hamachi. After you already inserted the name and password click Join.

If you successfully joined a network, your interface will look something like this, maybe with few other more connections.
15.1.
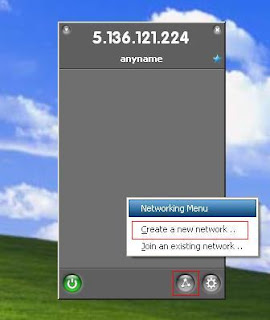
You can also create a new network so that others can join you. In order to do so, please click the networking button and choose create a new network.
15.1.2.
Put you desirable network name and password. Then click Create. In order to make people join your network, you have to give them your network name and its password.
After finish installing and setting, you can now play games with other people from any parts in the world by using the multiplayer options.
I understand that some you guys will noticed that the Hamachi icon in the system tray keep on flashing. So to make it stops, follow this steps....
1.
Right click on the flashing Hamachi icon. A menu will pop up then choose New Message.
A new window will pop up asking you to set a Master Password. Click Yes.
Insert the field with your desirable password. Make sure the new password box and confirm password box have the same password. Then click Change.

A new message box will appear stating that you have already set your master password. Click OK.
Ok, now you can use Hamachi with no problem.


